When using Microsoft Teams for virtual meetings, there isn’t any specific integration with Mediasite. What this means for a recording is that once the meeting is complete the recording will need to be manually uploaded to Mediasite utilizing either My Mediasite or the management portal.
Recording with Microsoft Teams
1. Record the Meeting with Microsoft Teams
When the Teams meeting is in progress:
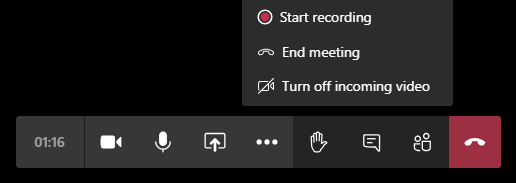
- Click … from the Teams meeting tools and click Start recording.
- The recording will begin, and Teams will notify participants that the meeting is being recorded.
- End the recording by clicking … and choose Stop Recording.
- Once the meeting has been completed, the recording will take a few moments to be saved and processed.
2. Download the Recorded Meeting
The Microsoft Teams meeting will save automatically to the Microsoft Stream cloud site however in order to get the video into Mediasite it needs to be downloaded.
- Locate the meeting recording within the meeting chat and click More Options (…) > Open in Microsoft Stream.
- On the video within Microsoft Stream, click … > Download original video.
- The downloaded recording can then be found on your computer in the Downloads folder.
3.Upload the Recording to Mediasite
Now that the meeting has been downloaded, it needs to get uploaded to Mediasite. This will follow the same steps for any video upload within either My Mediasite or the Management portal.
Within My Mediasite:
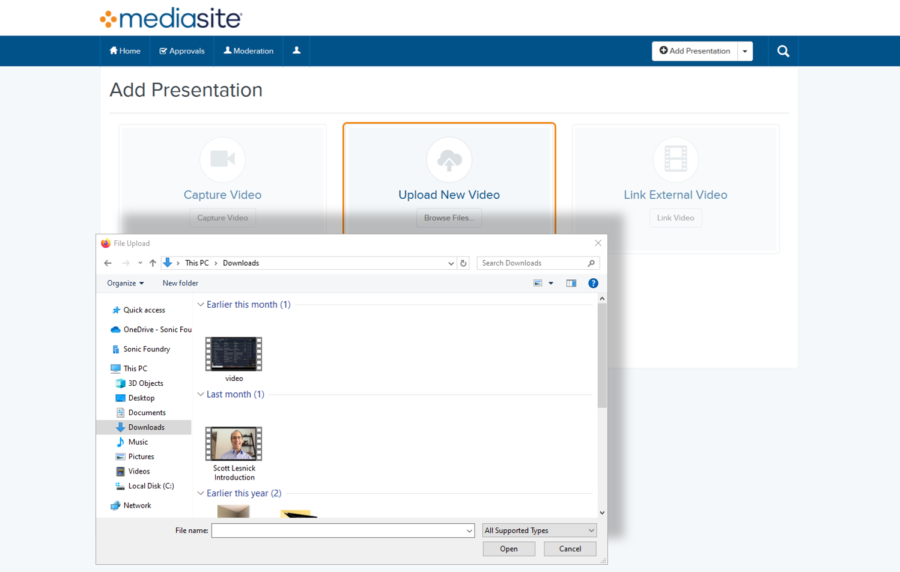
- Click Add Presentation and choose Upload New Video.
- Locate the video file on your PC > Downloads. Then click Open.
- Enter a video title, description and destination then click Create Presentation.
- Once the file completes processing it will be available to view and share.
Recorded Microsoft Teams Meeting
Was this Information helpful?
Let us know if you found this lesson helpful. That’s the only way we can improve.


