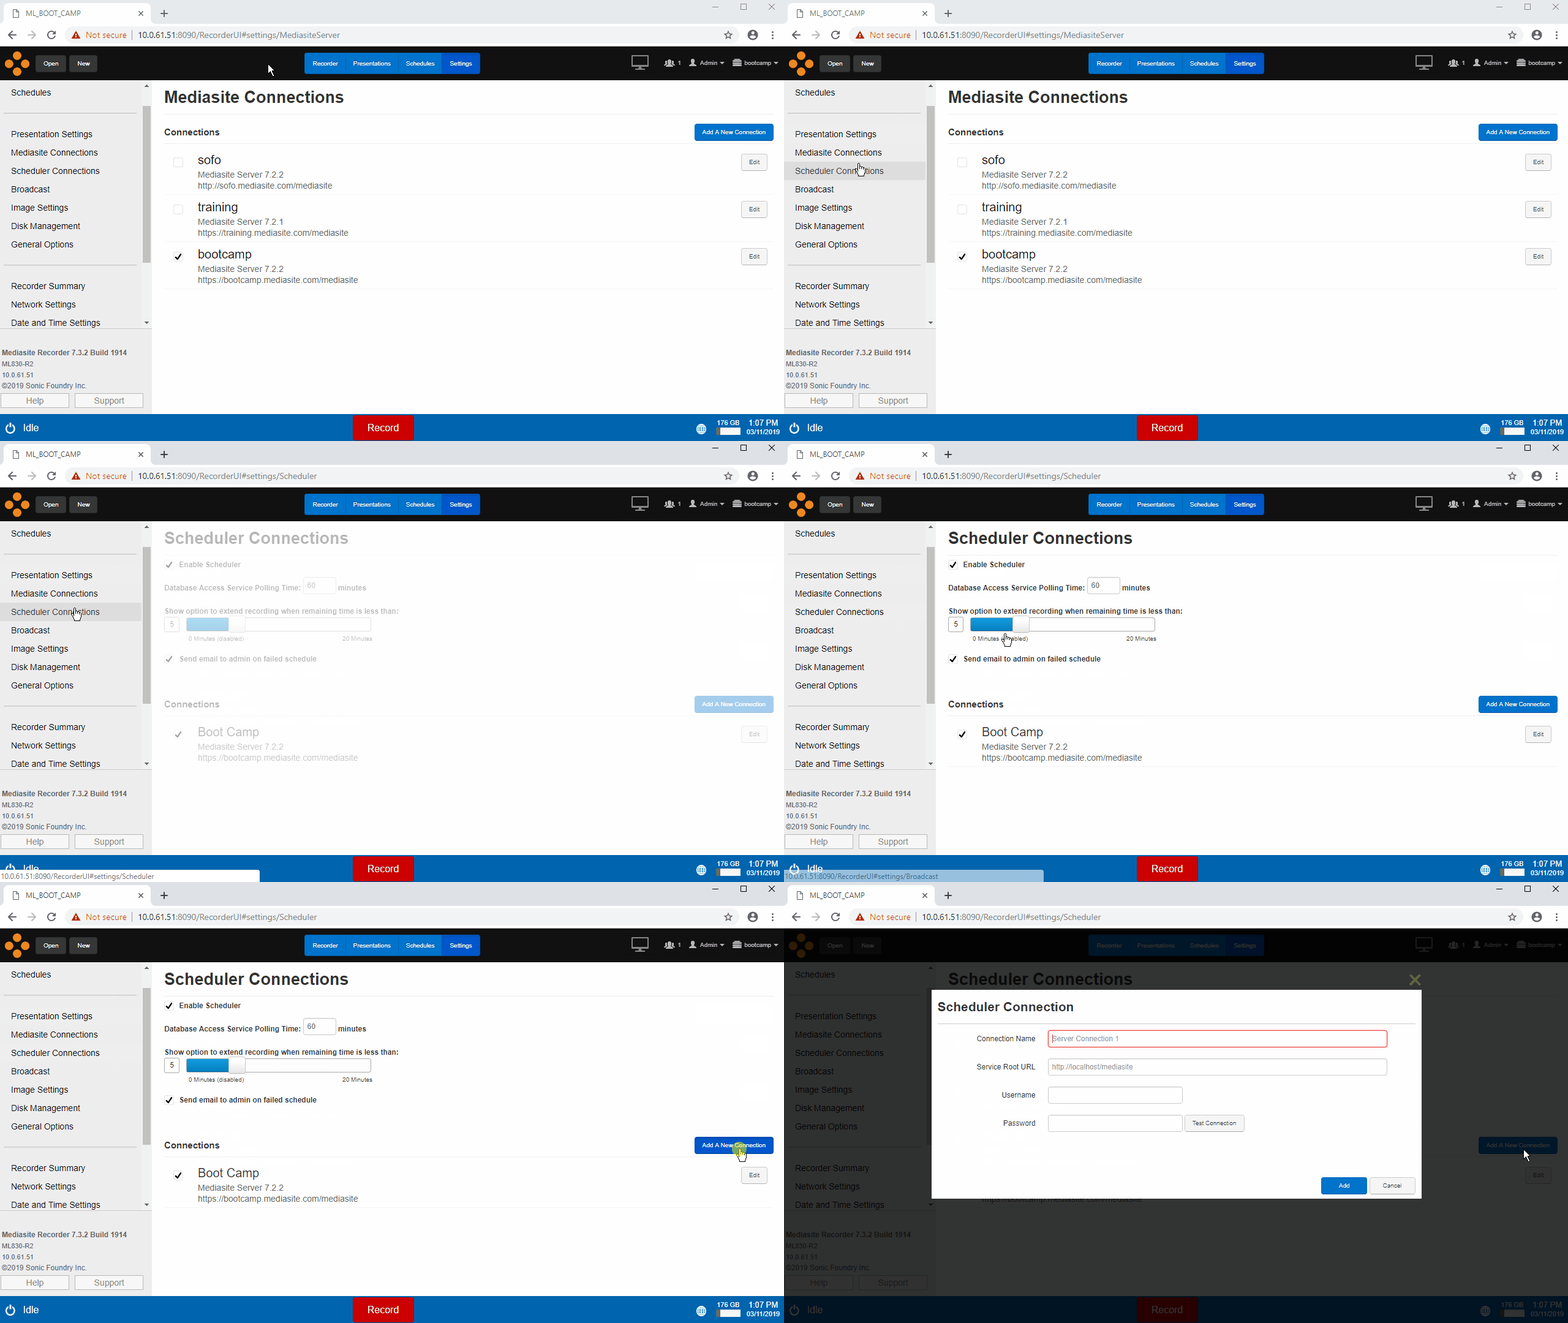
Setting up the scheduler is an optional step but needed for automated recordings. The information for a schedule connection may be different than what was used to connect to Mediasite Video Platform.
Course Content
Total learning: 24 lessons
Time: 75 minutes
-
Setting Up Your Recorder
-
Recorder Basics PreviewLecture1.1
-
Connecting the Inputs PreviewLecture1.2
-
Video Source Options PreviewLecture1.3
-
Audio Source Options PreviewLecture1.4
-
Content Source Options PreviewLecture1.5
-
-
Recorder Models
-
Mediasite Pro Recorder (RL1040A) PreviewLecture2.1
-
Mediasite Recorder (RL1020A) PreviewLecture2.2
-
Mediasite Mobile Recorder (M1041A) PreviewLecture2.3
-
ML941 PreviewLecture2.4
-
ML931 PreviewLecture2.5
-
RL940 PreviewLecture2.6
-
RL930 PreviewLecture2.7
-
RL220 PreviewLecture2.8
-
RL Mini PreviewLecture2.9
-
-
Configure and License
-
Access the Recorder Interface PreviewLecture3.1
-
Set Time Zone PreviewLecture3.2
-
Update Network Settings PreviewLecture3.3
-
Add Mediasite Connection PreviewLecture3.4
-
Set up Scheduler PreviewLecture3.5
-
License your Recorder PreviewLecture3.6
-
Update Software PreviewLecture3.7
-
Select Inputs PreviewLecture3.8
-
Create Default Template PreviewLecture3.9
-
Record PreviewLecture3.10
-
Set up Scheduler

6. Go to Settings > Scheduler Connections > Add A New Connection and enter the information for a schedule connection. As and example:
- Connection Name: Mediasite
- Service Root URL: https://organization.mediasite.com/mediasite
- Username: Use a local Application Administrator account
- Pass: *****
For connection details, please contact your Mediasite Administrator.
Was this Information helpful?
Let us know if you found this lesson helpful. That’s the only way we can improve.
Modal title
Main Content


